
To use your own domain as the Return Helper Shopify return page, follow these steps:
IMPORTANT: You should back up your DNS settings before making below changes.
Navigate to Custom Domain Settings:
Go to “Shopify Return” > “Shopify Customization” > Select your shop > Custom Domain.
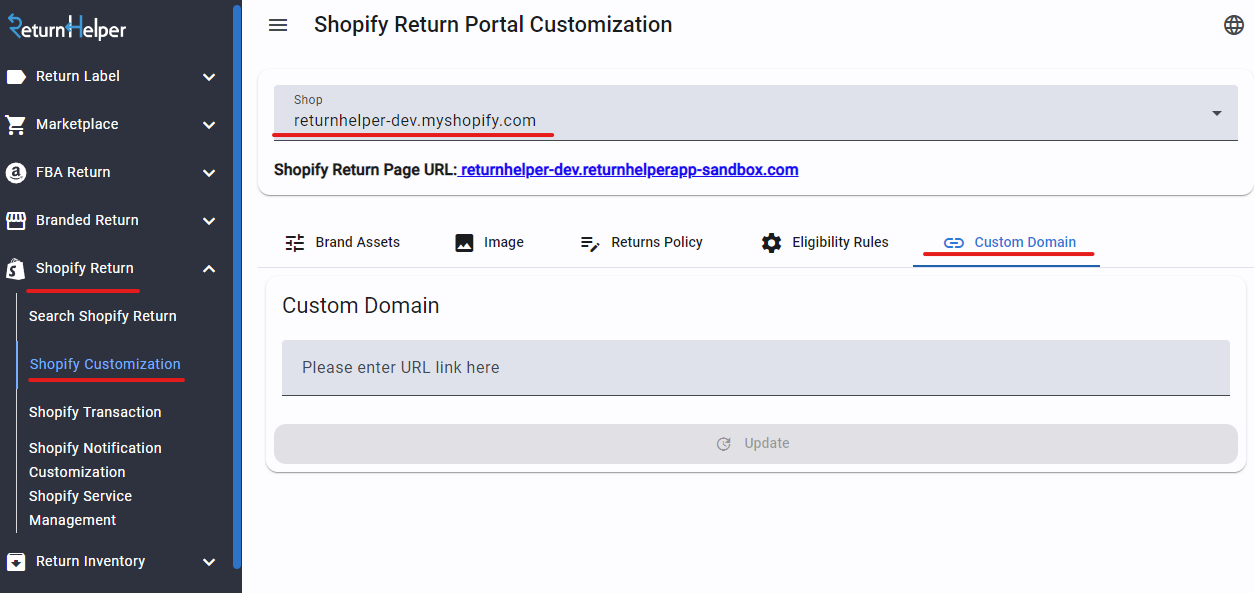
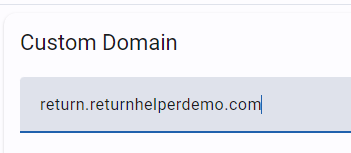
Enter Your Custom Domain:
Fill in the URL you would like your return page to be (e.g., return.yourdomain.com).
Double-check your input before submitting as it cannot be changed once submitted.
Set Up DNS Configuration:
You will see a CNAME and Value pair that you need to set up with your domain service provider.
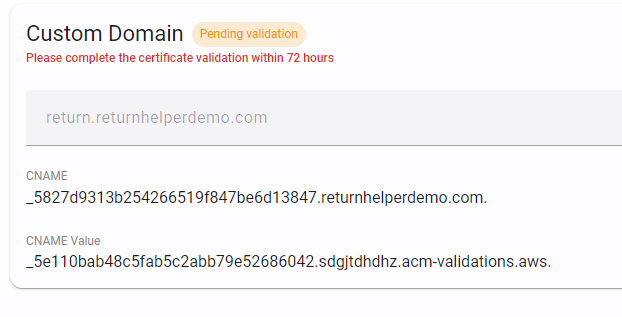
If the values are not presented immediately, please wait for a few minutes and check again.
Configure DNS Settings:
Below are examples for configuring DNS with commonly used service providers.
Example: GoDaddy
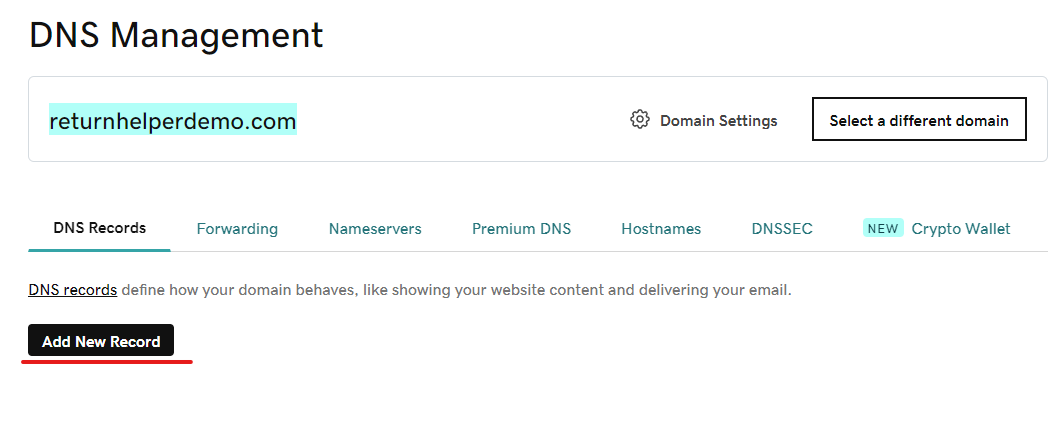
Log In to Your GoDaddy Account:
Go to DNS Management and select Add New Record.
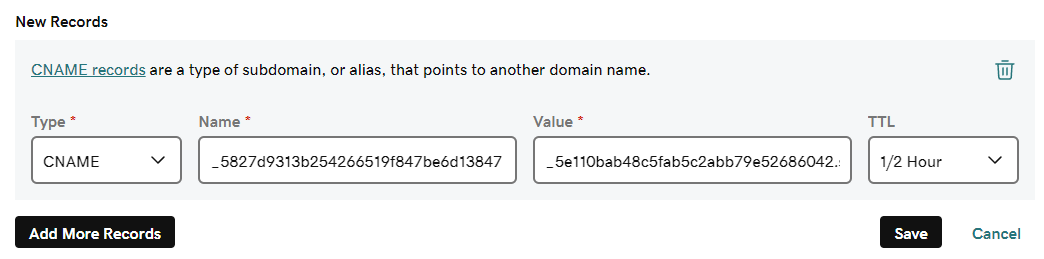
Fill in the Values:
Type: CNAME
Name: Subdomain of the CNAME
(the first character to the first dot character, not including the dot),
In this example, the CNAME value is
_5827d9313b254266519f847be6d13847.returnhelperdemo.com.
And we only take
_5827d9313b254266519f847be6d13847
as the CNAME value
Value: The entire CNAME Value
In this example:
_5e110bab48c5fab5c2abb79e52686042.sdgjtdhdhz.acm-validations.aws.
Save Your Changes:
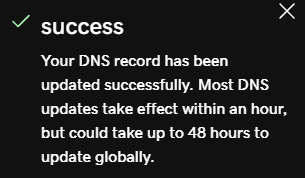
Save your changes, and you will see a success message.
Note that your DNS record may take up to 2 days to update.
Assign domain:
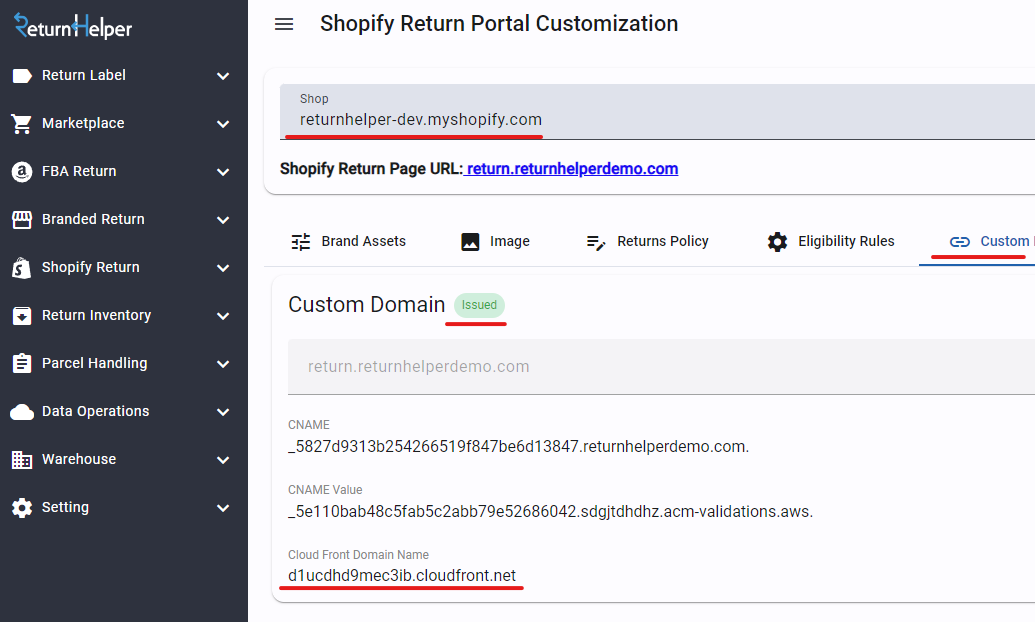
Once your DNS record updated, go back to Return Helper > Shopify Return > Shopify Customization > Select your store > Custom Domain, you will see the custom domain is marked as Issued now
Final Step: Assign Custom Domain to Target URL
Now you need to complete the final step, which is assigning the custom domain to your target URL.
In this example, the custom domain value is: d1ucdhd9mec3ib.cloudfront.net
and your target URL: return.returnhelperdemo.com
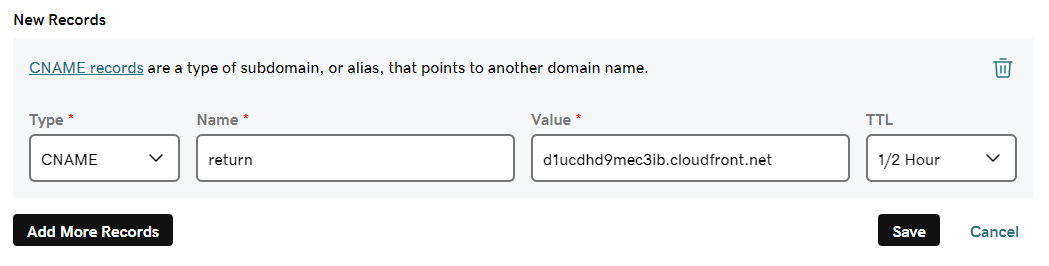
Add Another New Record in GoDaddy:
Go back to your GoDaddy DNS settings and add a new record.
Type: CNAME
Name: the subdomain of your target url, in this example: return (Do NOT include your domain name)
Value: the custom domain we provided, in this example: d1ucdhd9mec3ib.cloudfront.net
Save Your Changes:
You will need to wait for the DNS update before your URL is accessible. (May take up to 2 days)
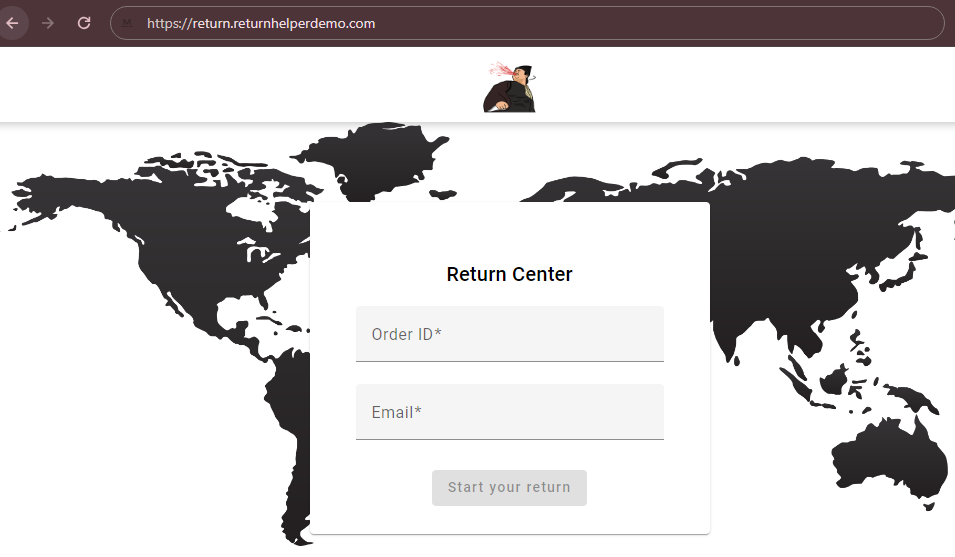
Your return portal is not reachable via your own domain
Example: Shopify
Log In to Your Shopify Account:
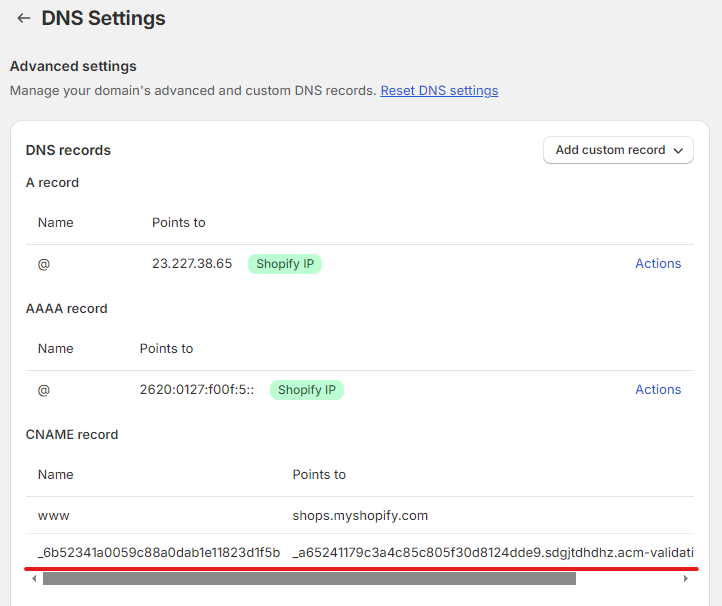
Go to Settings in your bottom left, then Domains > Domain settings > Edit DNS Settings
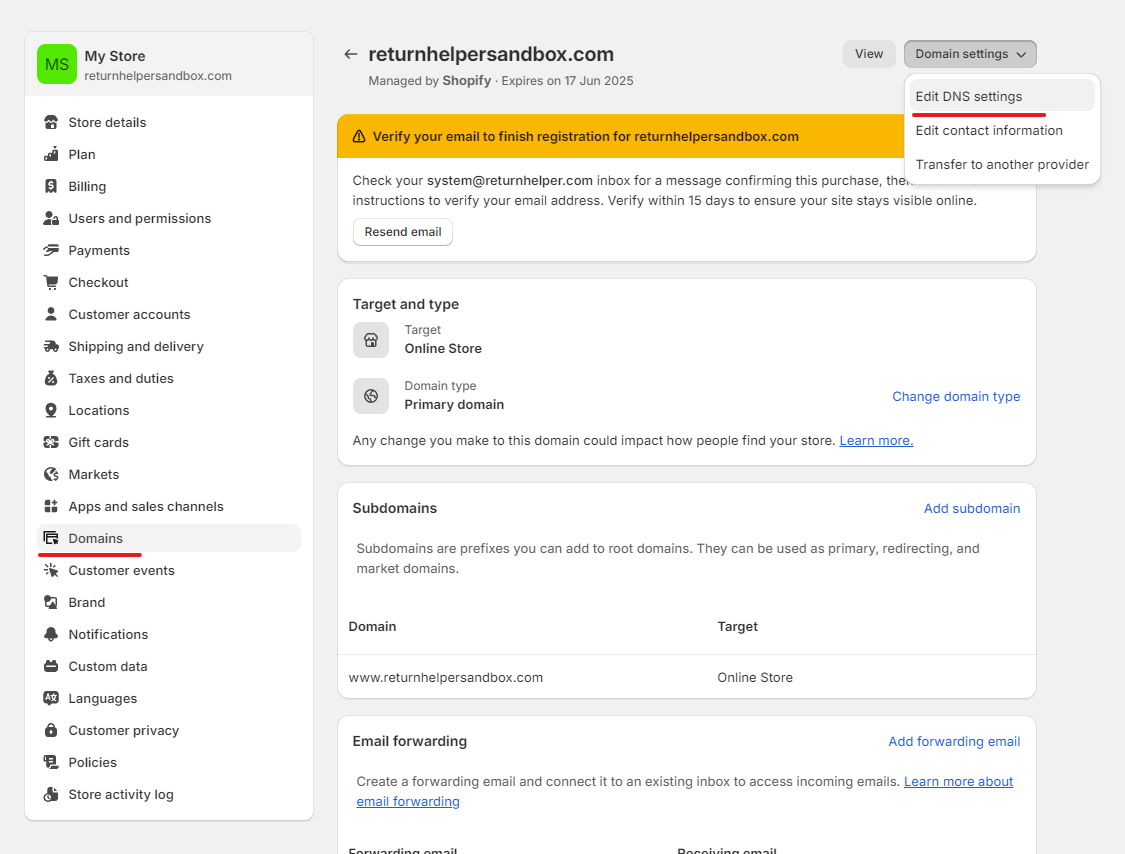
Add a new CNAME record
Add custom record > CNAME record
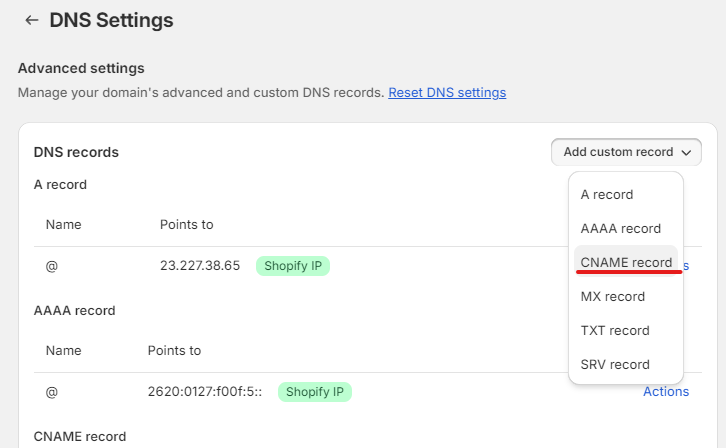
Fill in the Values:
Name: Subdomain of the CNAME
(the first character to the first dot character, not including the dot),
In this example, the CNAME value is
_6b52341a0059c88a0dab1e11823d1f5b.returnhelpersandbox.com.
And we only take
_6b52341a0059c88a0dab1e11823d1f5b
Value: The entire CNAME Value
In this example:
_a65241179c3a4c85c805f30d8124dde9.sdgjtdhdhz.acm-validations.aws.
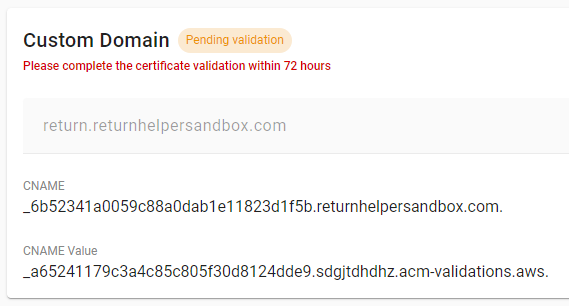
Ref: The values we used for this example
Submit and check the result
Once your DNS record updated, go back to Return Helper > Shopify Return > Shopify Customization > Select your store > Custom Domain, you will see the custom domain is marked as Issued now
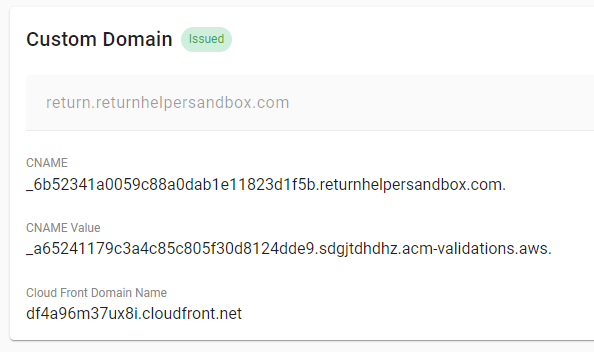
Final Step: Assign Custom Domain to Target URL
Now you need to complete the final step, which is assigning the custom domain to your target URL.
In this example, the custom domain value is: df4a96m37ux8i.cloudfront.net
and your target URL: return.returnhelpersandbox.com
Add Another New Record in Shopify:
Go back to your Shopify DNS settings and add a new CNAME record.
Name: the subdomain of your target url, in this example: return (Do NOT include your domain name)
Value: the custom domain we provided, in this example: df4a96m37ux8i.cloudfront.net

Save Your Changes:
You will need to wait for the DNS update before your URL is accessible. (May take up to 2 days)
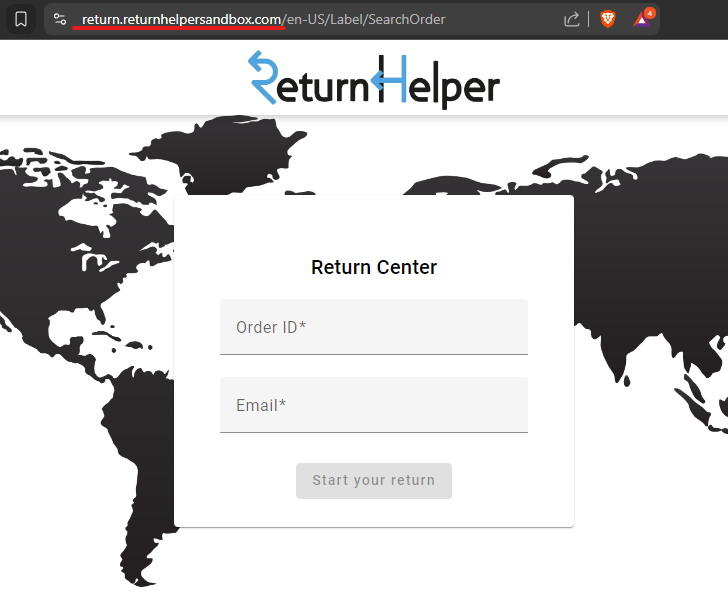
Your return portal is not reachable via your own domain
Custom Domain Troubleshooting
Verify Domain Registration with Google Dig
If you are experiencing issues with your custom domain after completing the setup, you can verify its registration using Google Dig.
- Open Google Dig:
Open your web browser and go to Google Dig.
- Enter Your Custom Domain:
In the "Name" field, enter the CNAME you would like to check.
- Select CNAME:
Ensure you are in the "CNAME" tab.
- Run Dig:
Click on the "DIG" button to initiate the query.
- Review Results:
Examine the results returned by Google Dig.
- Successful Registration: If the domain is correctly registered and pointing to the intended target (the custom domain value provided by Return Helper), you will see a CNAME record in the results that matches the value you configured in your DNS settings.
- Registration Issues: If the results do not show the expected CNAME record, or if the dig fails to resolve the domain, it indicates an issue with the DNS configuration or propagation.
-
Possible Issues:
- DNS Propagation Delay: DNS changes can take up to 48 hours to propagate across the internet. If you recently made changes, wait for some time and try the Dig again.
- Incorrect CNAME Value: Double-check that the CNAME and Value you entered in your DNS settings are exactly the same as the ones provided by Return Helper.
- DNS Record Errors: Verify that there are no conflicting DNS records for the same subdomain in your DNS settings.
- Domain Provider Issues: If the problem persists, contact your domain provider's support for assistance with DNS configuration.
Screenshot of success CNAME registration:
Screenshot of unregistered CNAME registration:
Comments
0 comments
Please sign in to leave a comment.